

A successful BMW G80 M3 carbon fiber build is not about fitting the largest possible number of parts. The stronger approach is to connect the front bumper, side profile, mirrors and engine bay with a consistent material and finish, while keeping the vehicle’s sensors, panel gaps and daily-driving clearance in mind.
This workshop project documents the areas that were photographed during the installation session: the carbon fiber front lip, front bumper fins, mirror caps and engine bay covers. It does not present an undocumented rear diffuser or rear spoiler installation as part of the same session.
Owners planning a wider exterior package can browse the full BMW G80 M3 carbon fiber parts collection before choosing a front, side or rear upgrade path.
What Was Included in This BMW G80 M3 Upgrade?
The vehicle was inspected together with several G80-compatible carbon fiber options. Laying the parts out beside the car allowed the team to compare scale, surface finish and installation type before work began.
- BMW G80 M3 carbon fiber front lip
- BMW G80 M3 front bumper canards and fins
- BMW G80 M3 dry carbon fiber mirror caps
- BMW G80 M3 carbon fiber engine bay covers
- BMW G80 M3 front engine bay panel cover
- All BMW G80/G81 M3 carbon fiber parts

What Should Be Checked Before Installing G80 M3 Carbon Fiber Parts?
Before removing backing tape, clips or factory trim, the installer should confirm the vehicle and the product as a pair. A part can look visually correct in a listing while still differing in mounting points, sensor clearance or body-style fitment.
Confirm G80 M3 Sedan rather than G81 Touring, G82 Coupe or G83 Convertible.
Use the year range stated on the individual product page.
Check parking sensors, cameras, ACC equipment and existing aftermarket trim.
Confirm whether the part is add-on, replacement, clip-in, tape-on or mechanically fastened.
Compare weave direction, gloss level and dry-versus-wet carbon appearance.
Review ride height, driveway angle, ramps and parking stops before fitting a lower lip.
Why Is Surface Preparation Important?
Adhesive-mounted exterior parts depend on the condition of the surface beneath them. Dust, wax, polishing residue, moisture and ceramic-coating residue can reduce adhesion and make an otherwise well-shaped part lift at the edge.
The photographed vehicle was cleaned before the carbon fiber pieces were positioned. The important areas are not only the visible paintwork, but also the lower bumper edges, recessed mounting zones and the underside of any factory trim that will carry tape or fasteners.

Preparation checklist
- Wash and dry the relevant panel.
- Remove wax, dressing and oily residue from the mounting zone.
- Inspect repaired paint, damaged clips or distorted bumper edges.
- Test-fit the part before exposing adhesive.
- Mark the center and the left-to-right position with removable tape.
How Were the Carbon Fiber Front Bumper Fins Positioned?
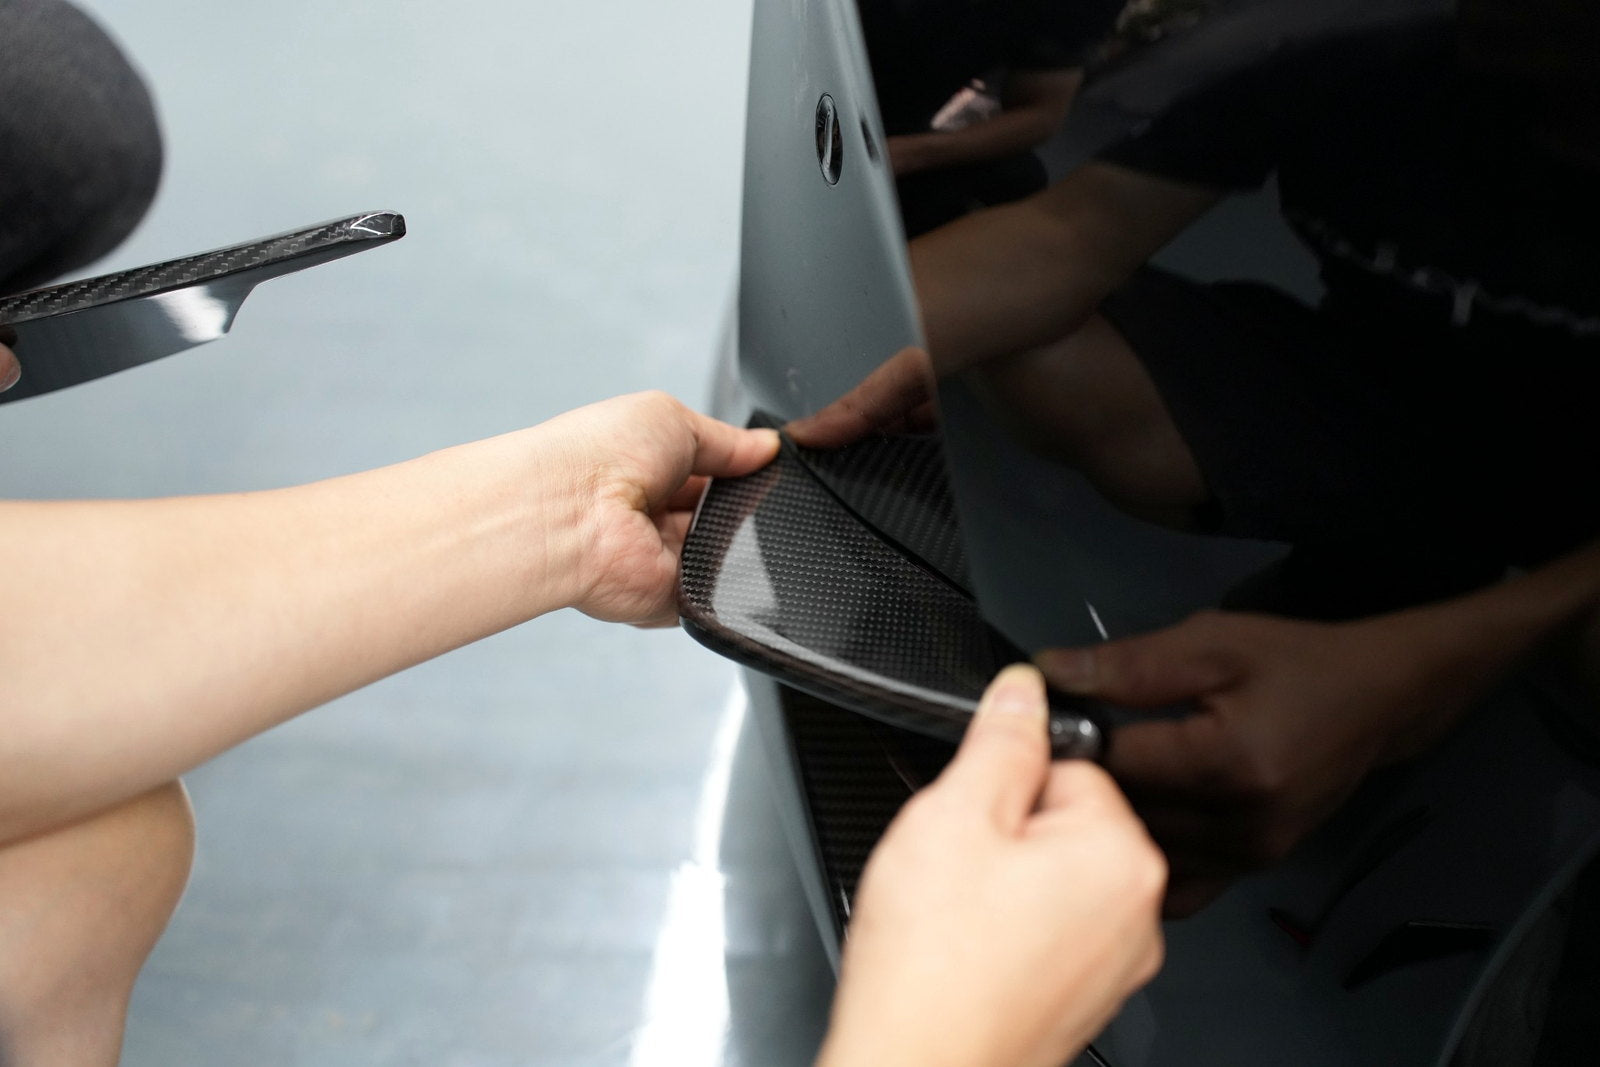
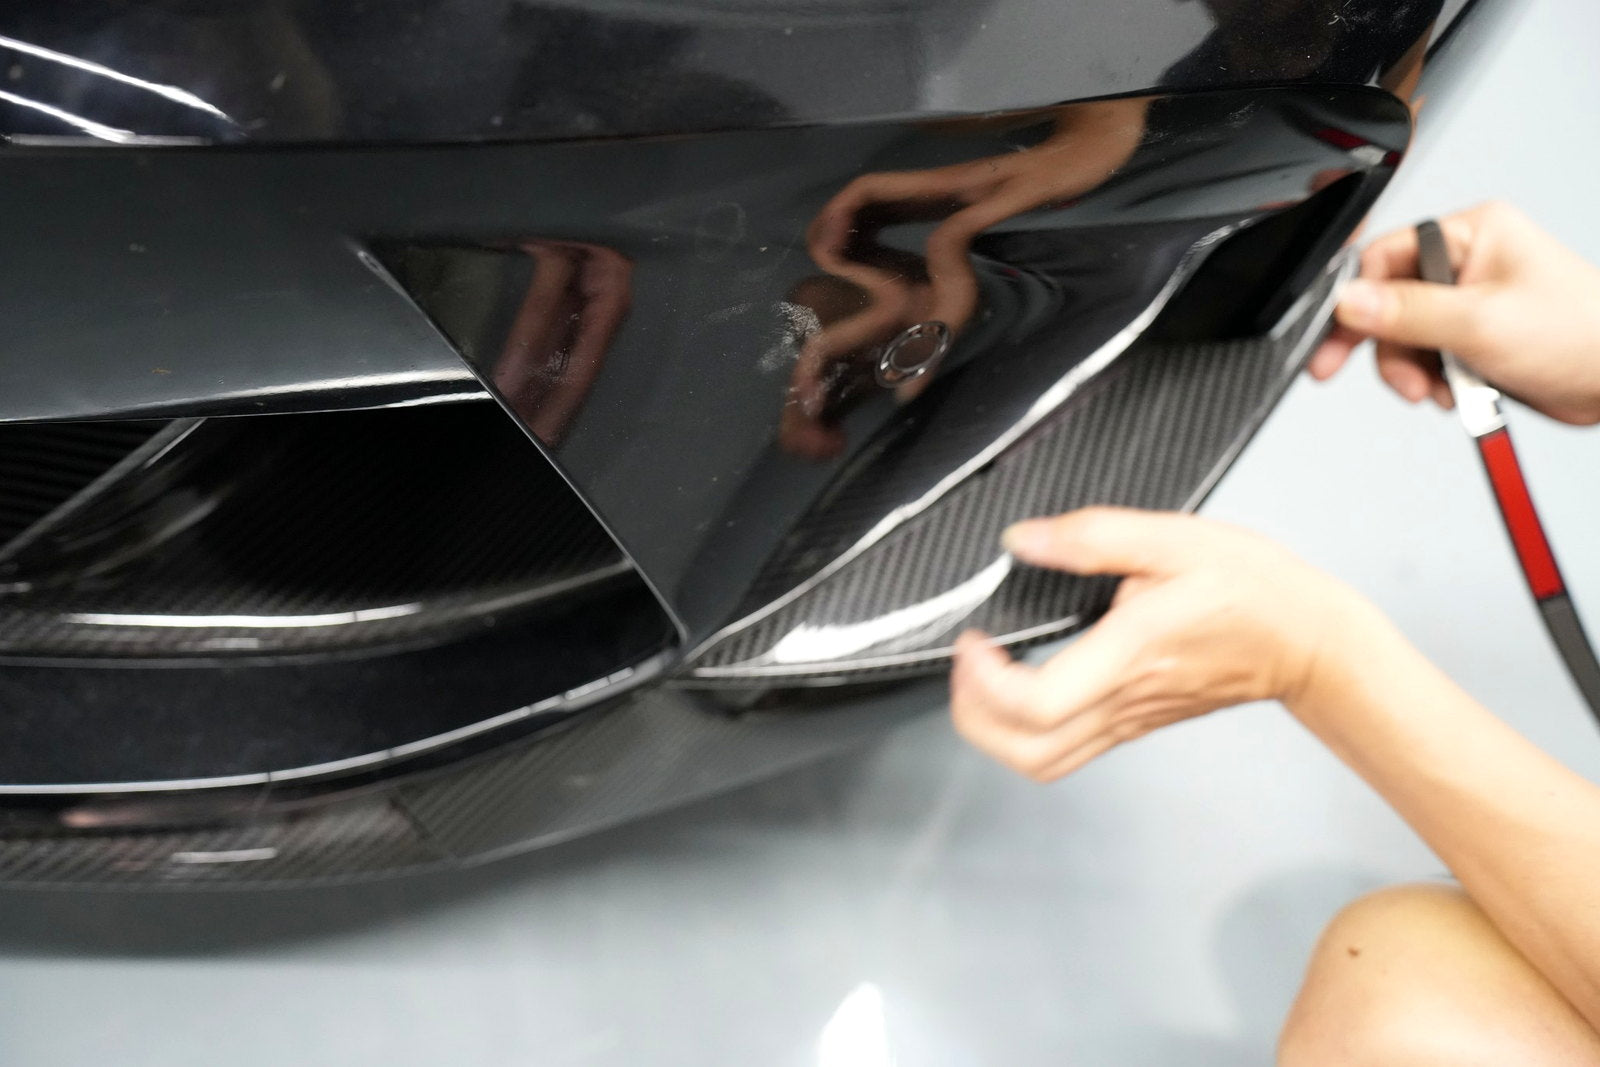
The G80 M3 front bumper already contains several strong angles. Extra fins or canards need to follow those lines rather than appear as unrelated pieces attached to the corner.
During the photographed test fit, the installer held each carbon fiber fin against the bumper before applying final pressure. This made it possible to compare the angle, spacing and relationship with the lower front lip.
What matters during alignment?
- The left and right sides should begin at matching visual points.
- The upper and lower fins should maintain intentional spacing.
- The parts should not interfere with parking-sensor zones or panel seams.
- The tips should follow the bumper direction instead of pointing at unrelated angles.
- Final pressure should only be applied after both sides have been compared.
For comparable G80/G82/G83 options, see the carbon fiber front bumper canards and air-fender fins product page.
How Does the Carbon Fiber Front Lip Change the G80 M3?
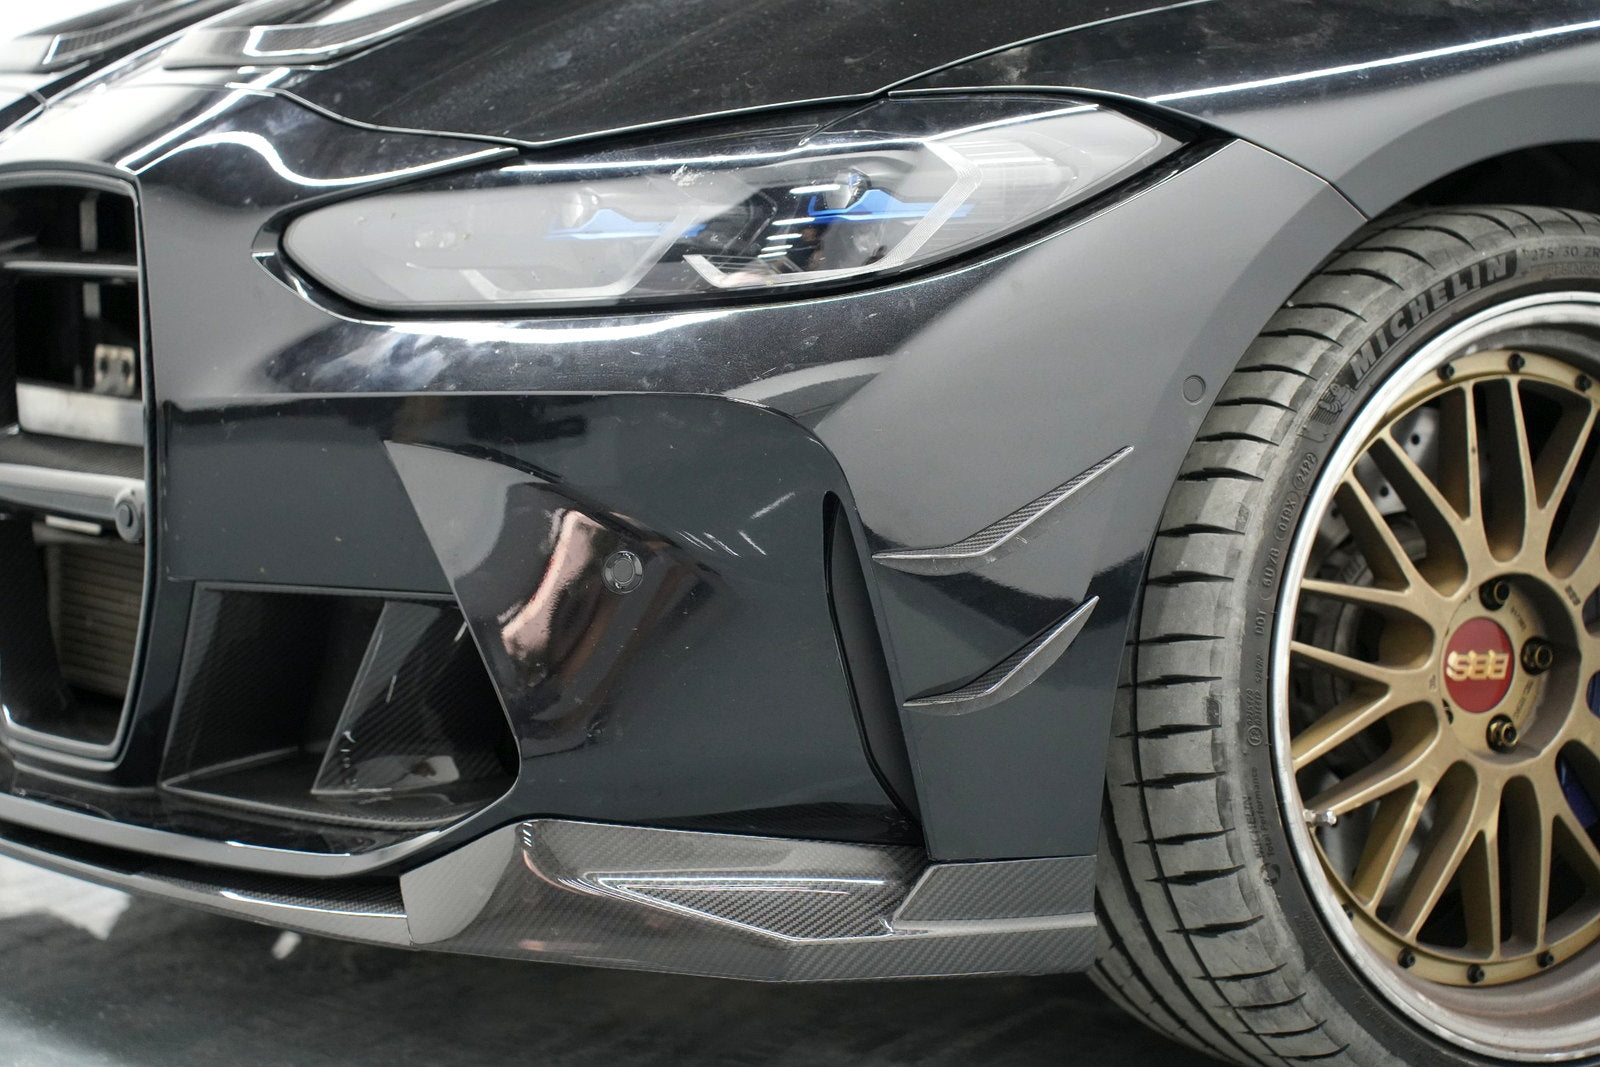
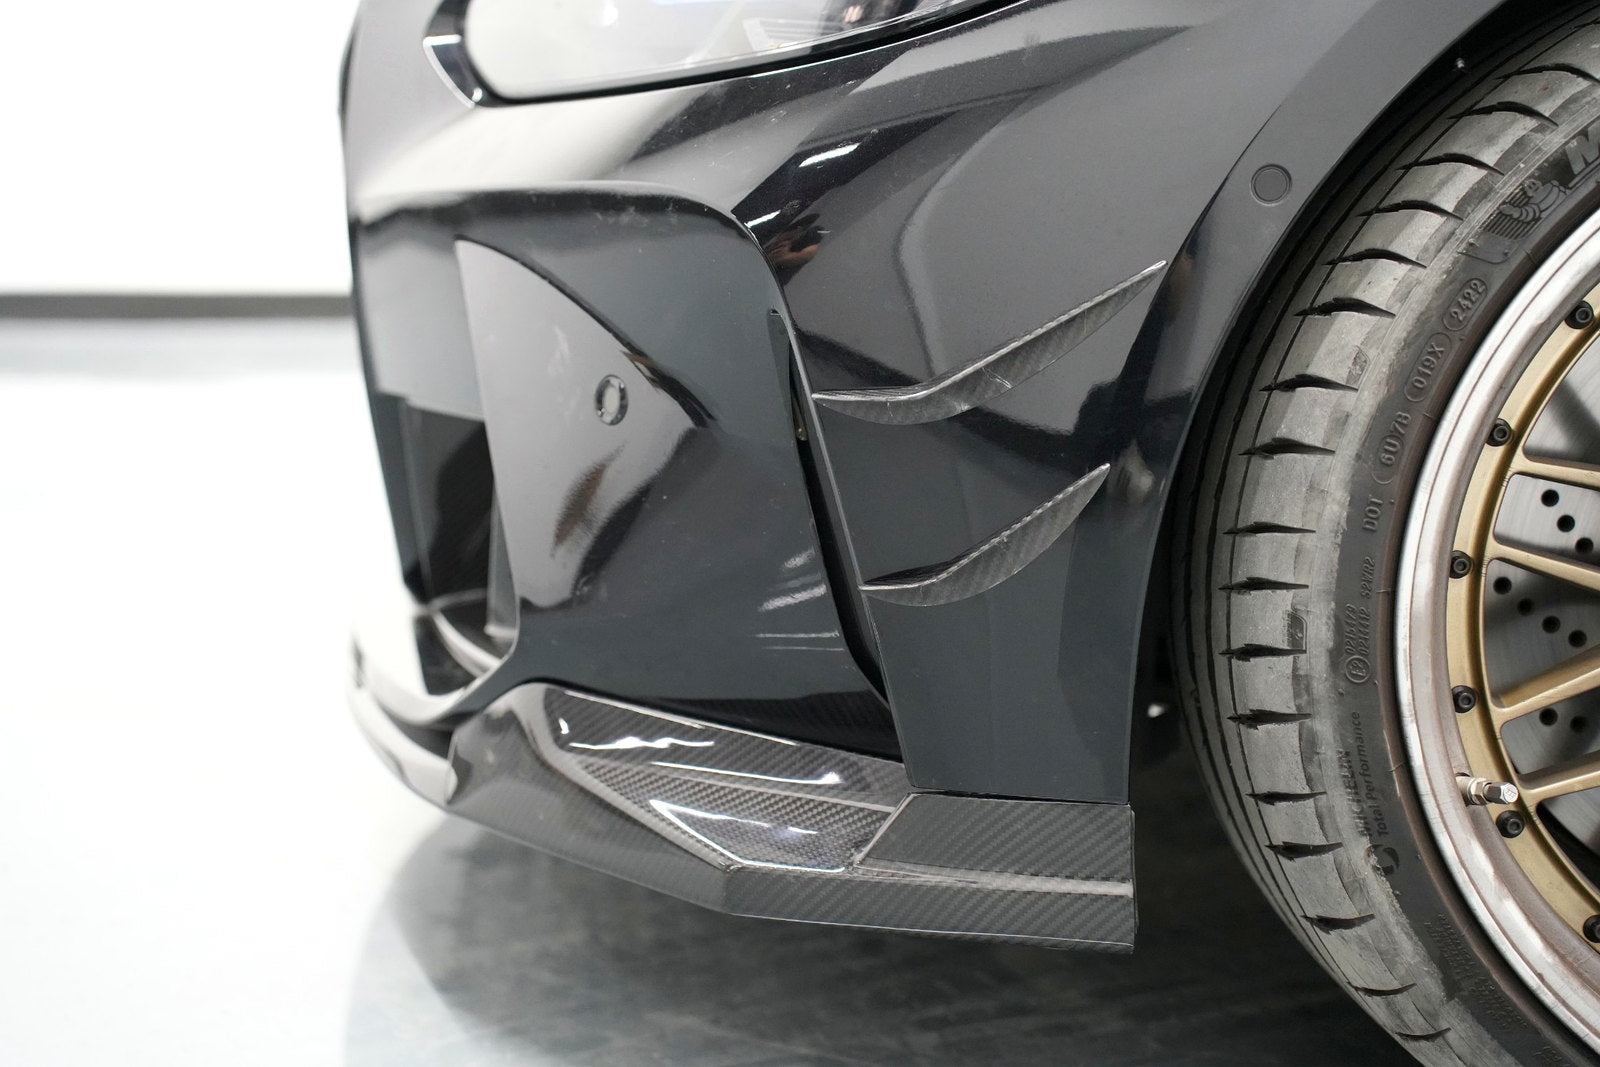
The front lip creates the visual baseline for the entire front-end build. On this black G80 M3, the gloss carbon fiber remains subtle at normal viewing height, while the weave becomes more visible from a lower angle and under direct workshop lighting.
The most important fitment areas are the center section, the corners near the front wheels and the transition between the lip and the bumper fins. Fully fastening one side before centering the part can produce an uneven opposite corner.
Front lip checks after installation
- Compare the left and right corner height.
- Check that fasteners are secure without crushing the laminate.
- Inspect clearance at parking ramps, speed bumps and steep driveways.
- Confirm that no edge is under tension or being pulled into position by a screw.
- Recheck the mounting points after the first drives.
Browse the related BMW G80 M3 dry carbon fiber front lip, and confirm the listed year and bumper fitment before purchase.

What Should Be Checked When Fitting Carbon Fiber Mirror Caps?
Mirror caps are smaller than a front lip, but they are seen from the front, side and driver’s seat. The photographed vehicle also has a camera beneath the mirror housing, so the cap and installation method must retain the required opening and avoid blocking the indicator or camera area.
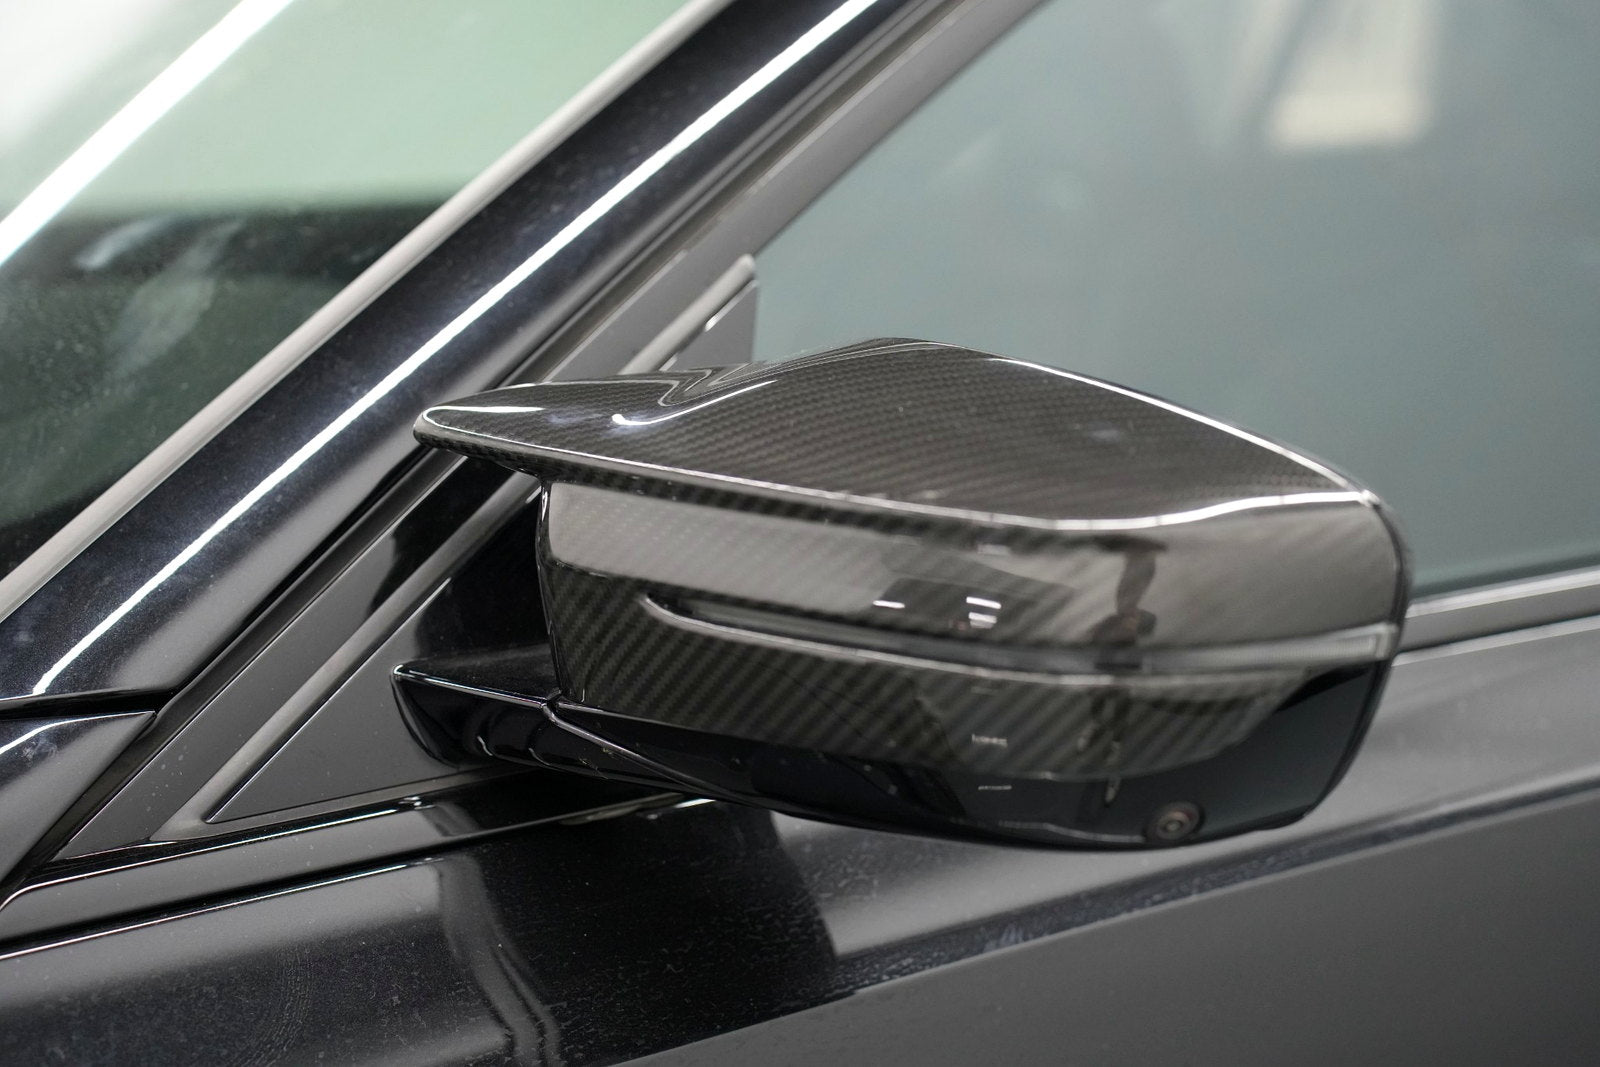
Add-on and replacement mirror caps do not install in the same way. An add-on cover sits over the original housing and relies heavily on surface preparation. A replacement shell requires the original housing to be unclipped and demands more care around clips, indicators, cameras and wiring.
The related BMW G80 M3 dry carbon fiber mirror-cap page should be checked for left-hand-drive compatibility, product variation and installation type.
How Was the Carbon Fiber Engine Bay Kit Installed?
The engine bay is the most clearly documented installation stage in this project. The work progressed from an exposed factory engine bay to test fitting the side panels and central cover, then to a final alignment inspection.
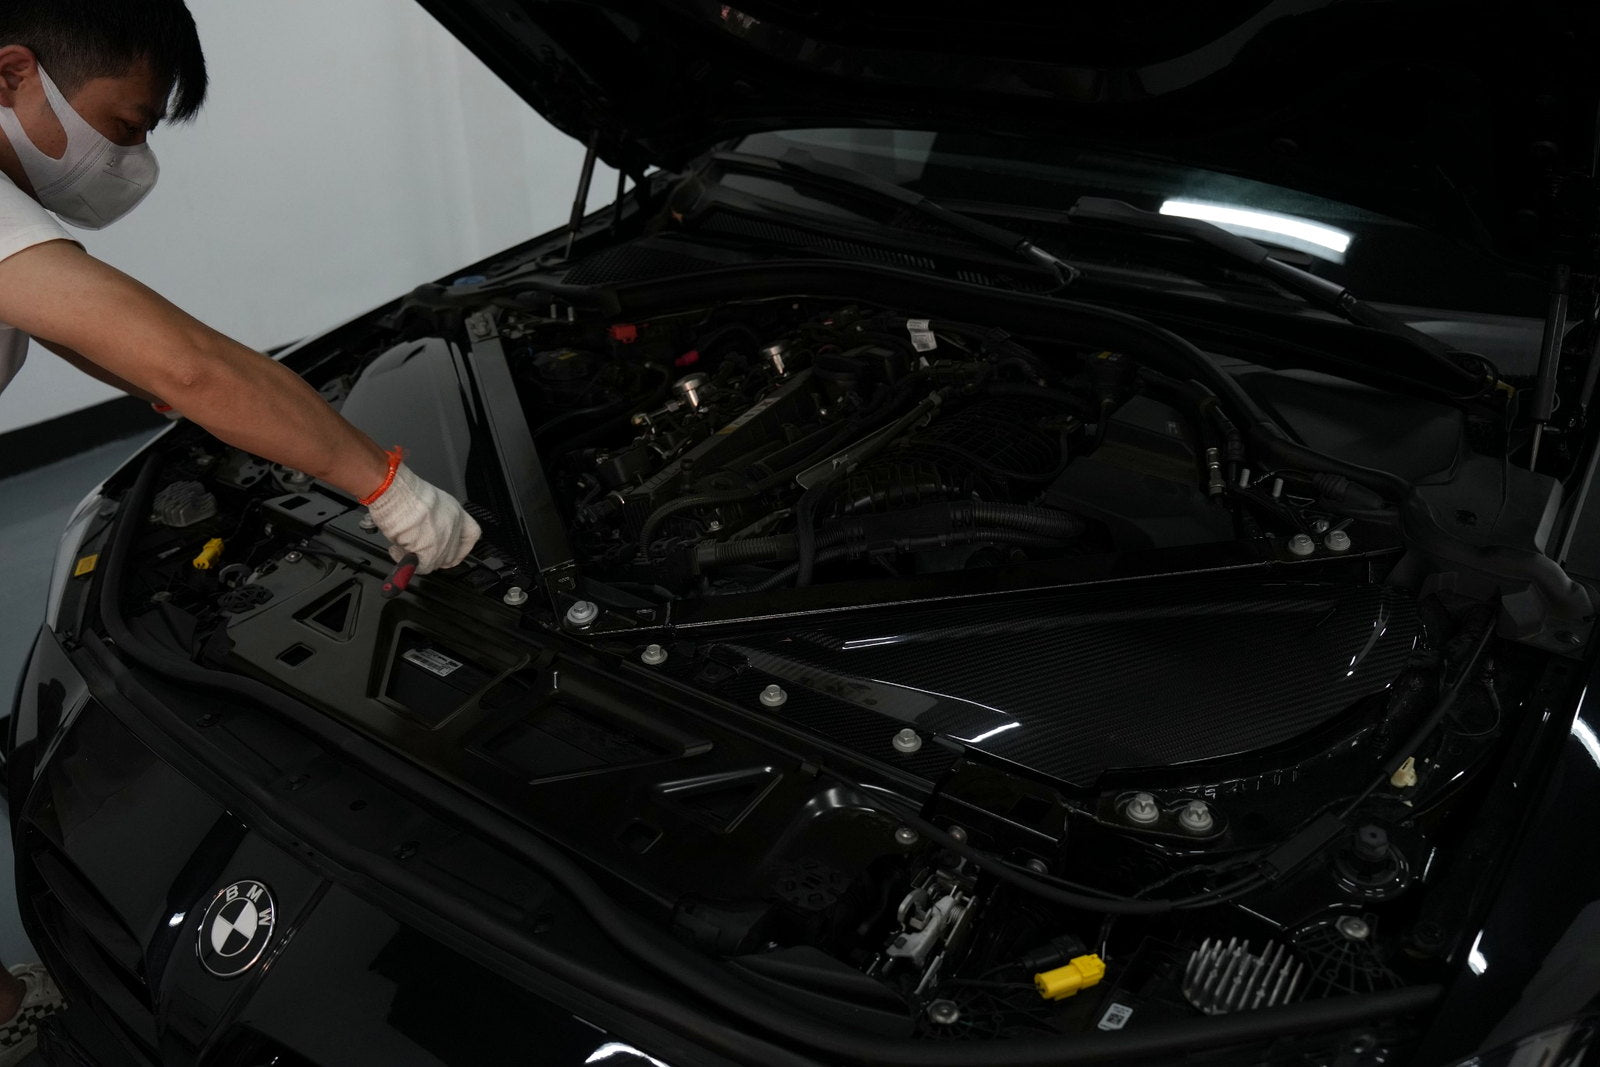
1. Inspect the original mounting area
Before placing the carbon fiber parts, the technician checked the surrounding fasteners, hoses, wiring and factory covers. A cosmetic engine cover should not place pressure on a hose, rub against wiring or obstruct access to service points.
2. Test-fit the side panels and central cover
The parts were lowered into position without forcing them. The technician compared the perimeter gaps and checked how the central cover sat between the two carbon fiber side panels.
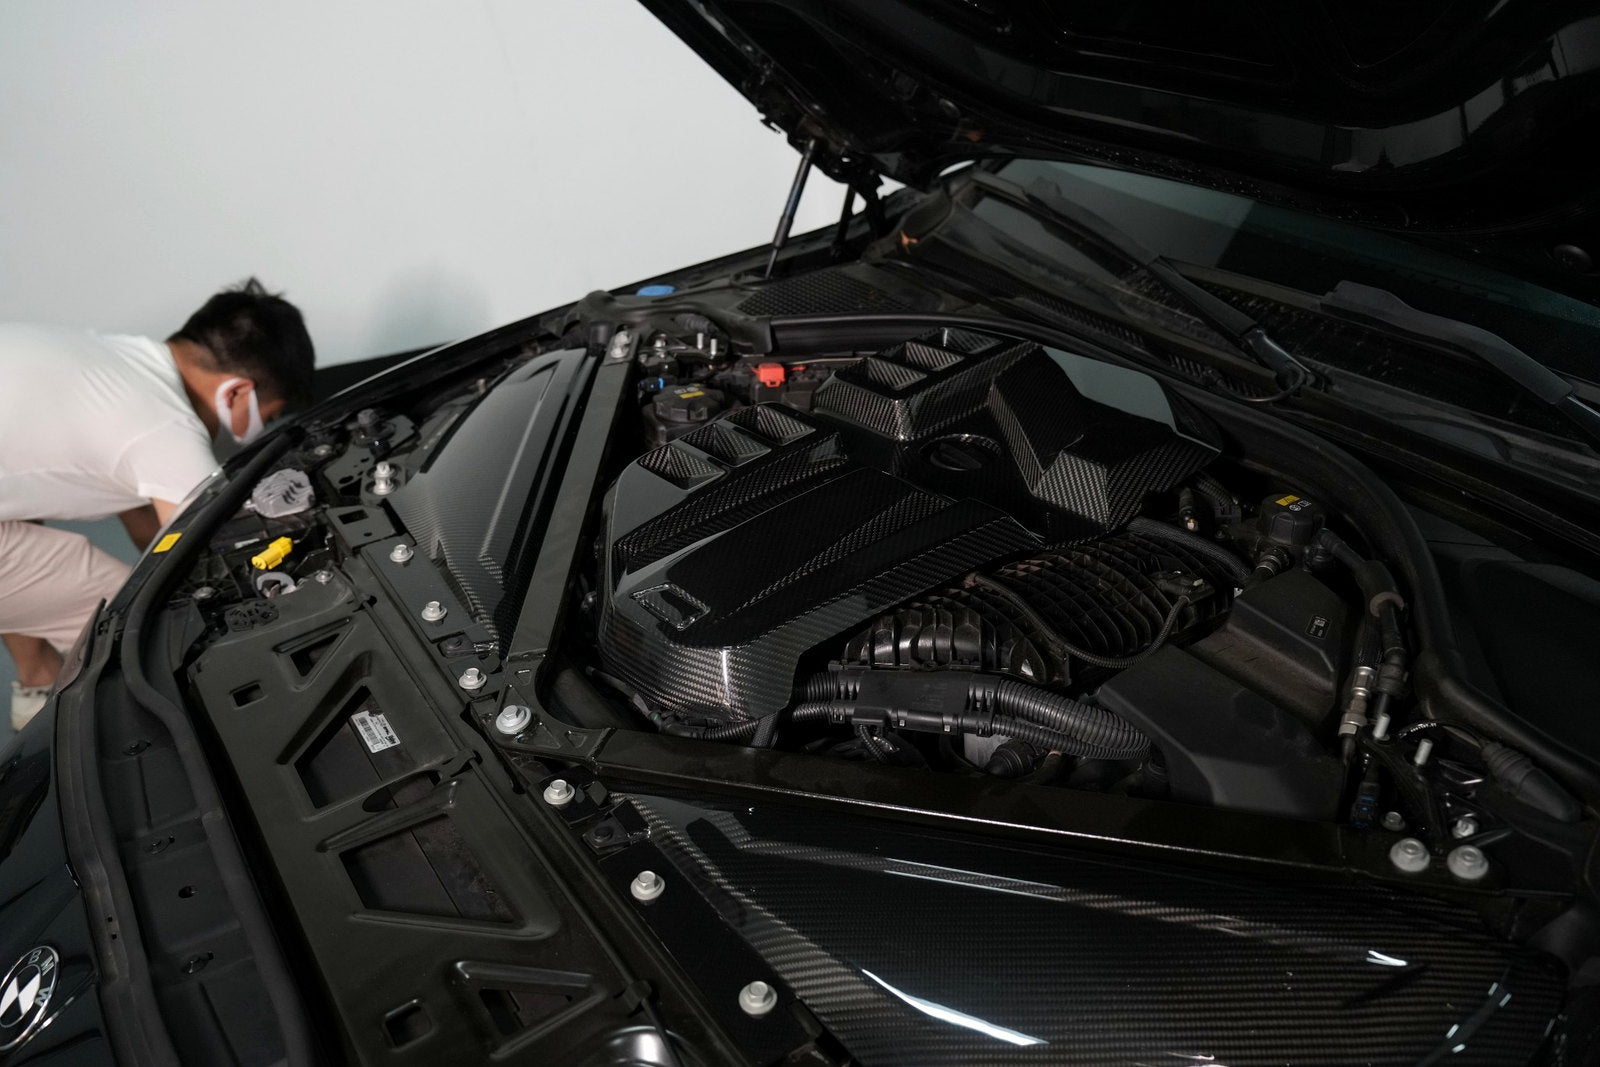
3. Check clearance and symmetry
The front edge, oil-access area, intake-side clearance and surrounding hardware should remain accessible. The cover should sit naturally rather than being pulled flat by fasteners.
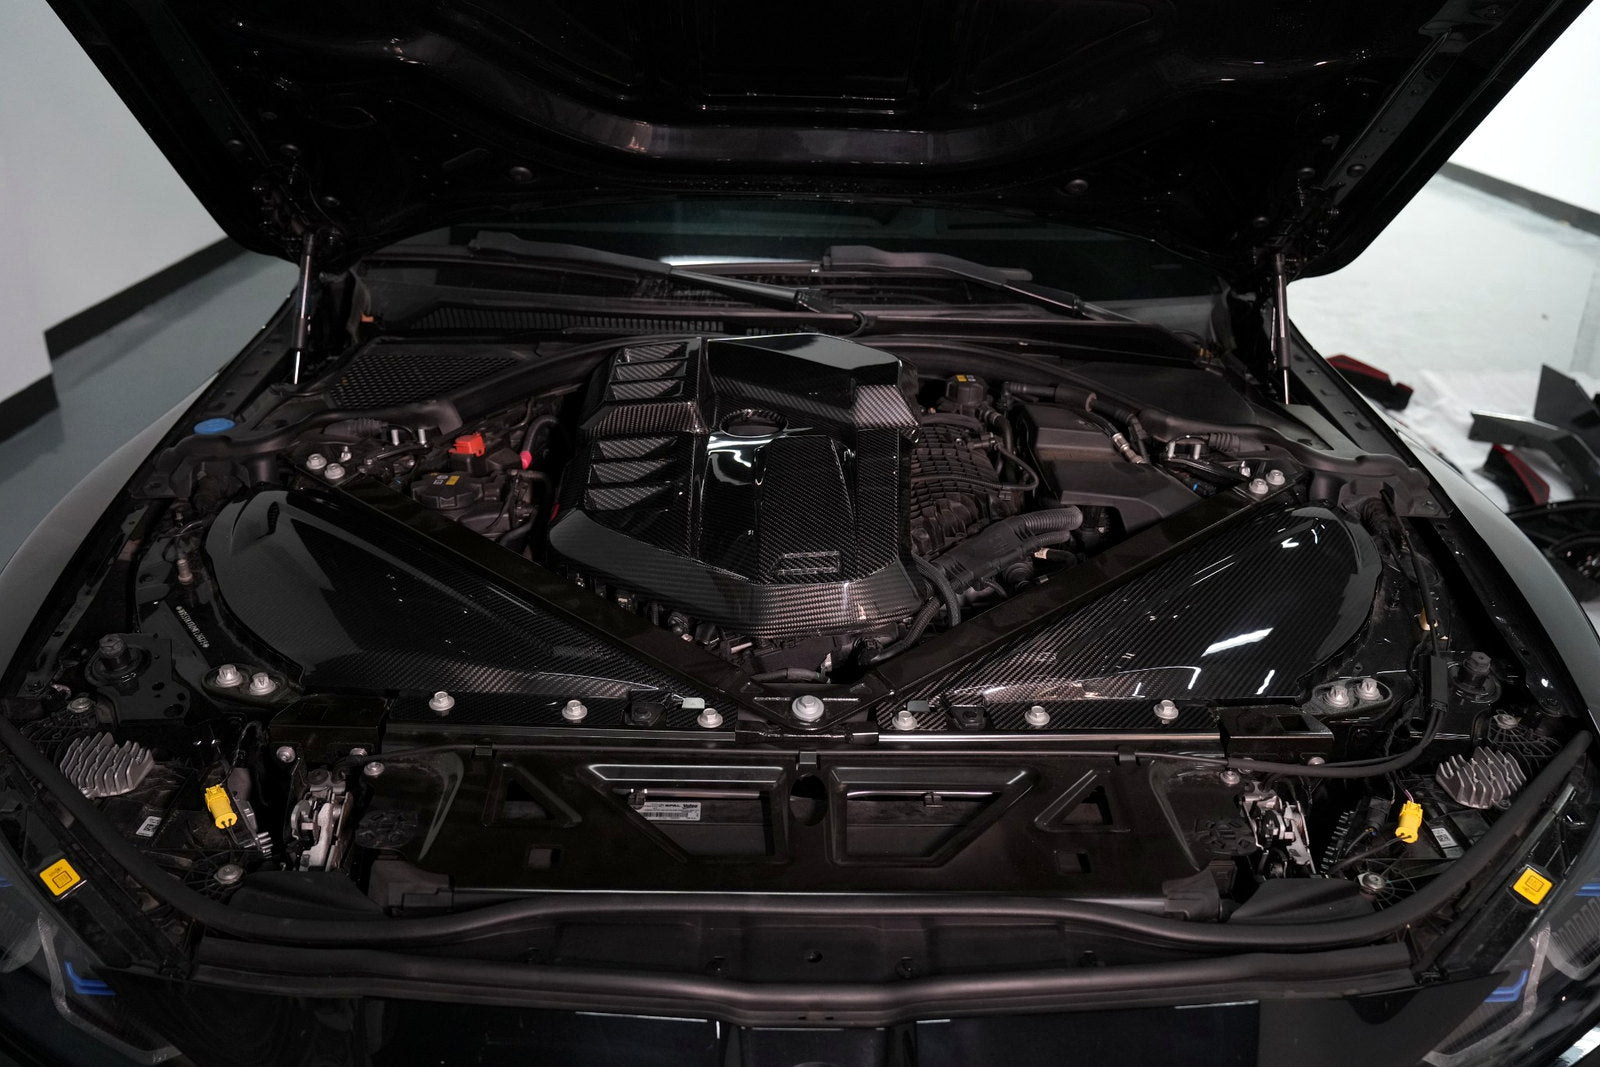
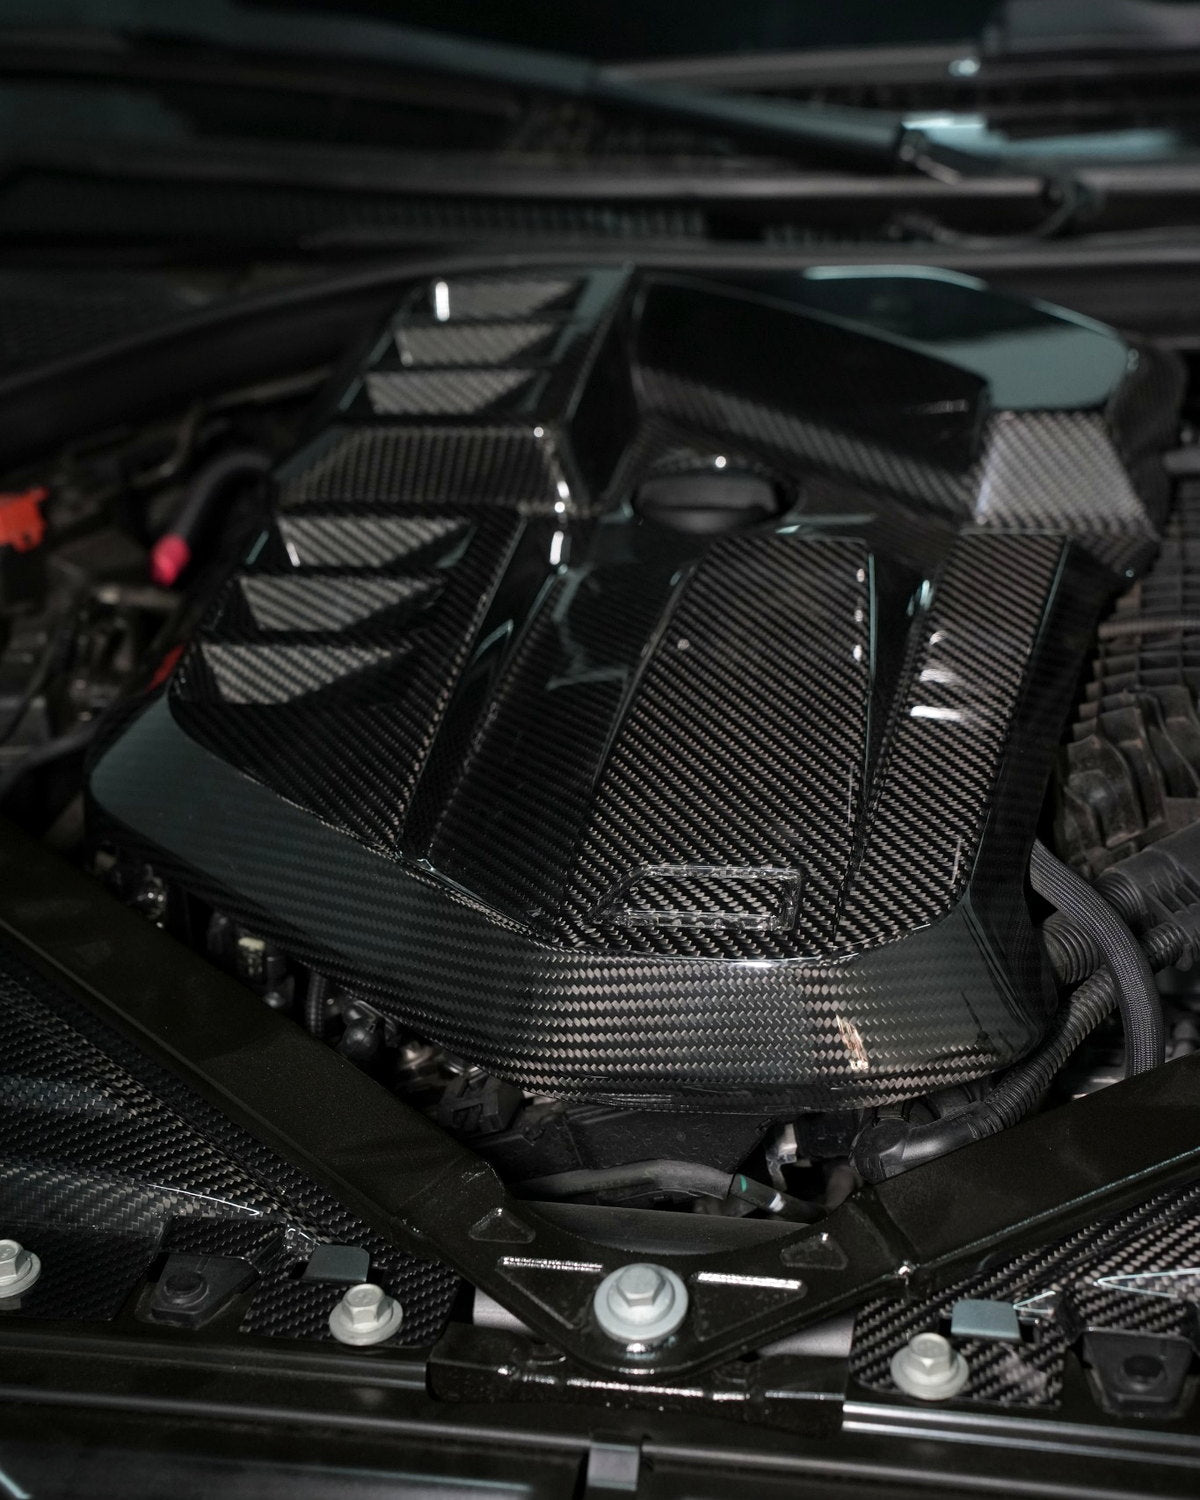
Related options include the BMW G80 M3 carbon fiber engine bay cover set and the front engine bay panel cover. Match the exact package contents to the pieces required for the vehicle.
What Are the Most Common G80 M3 Modification Problems?
Ordering from the chassis code alone
“G80” is a useful starting point, but it does not replace the model year, body style, bumper configuration and installation notes shown on the product page.
Assuming G80 and G81 rear parts are the same
The G80 is a Sedan with a trunk. The G81 is a Touring with a long roof and rear hatch. Front-end ideas may overlap, but trunk spoilers, roof spoilers and other rear parts should follow the correct body structure.
Ignoring cameras and parking sensors
Mirror caps, grille-related parts and bumper trim must leave the vehicle’s cameras and sensor zones usable. Test the relevant functions after installation rather than judging the work only by appearance.
Mixing unrelated carbon finishes
A dry-carbon mirror cap, deep-gloss wet-carbon lip and a differently scaled weave can make the car look assembled from unrelated products. The finish does not have to be identical everywhere, but differences should be intentional.
Skipping the dry fit
Adhesive and final fasteners should come after—not before—the part has been centered and compared from several viewing angles.
How Does the Completed BMW G80 M3 Upgrade Look?
The finished front-end works because the changes follow the original bumper architecture. The front lip establishes a lower edge, the bumper fins add detail near the wheel openings, and the mirror caps carry the carbon fiber finish upward without turning the entire body into one continuous dark surface.
Inside the engine bay, the central cover and side panels create a more complete presentation when the hood is open. The build remains visually connected because the exterior and engine-bay pieces share a gloss woven-carbon appearance.
This is a focused workshop build rather than an undocumented claim that every G80 part on the floor was installed on the same vehicle. Owners planning a second stage can compare G80 M3 side skirts, a compatible rear diffuser and a rear trunk spoiler after confirming the exact body style and product version.
BMW G80 M3 Carbon Fiber Upgrade FAQ
Will these parts fit every BMW G80 M3?
No single statement should be applied to every product. Confirm the model year, body style, trim, bumper configuration, sensor equipment and installation type on each product page.
Can the front bumper fins be installed without removing the bumper?
The photographed installation shows exterior positioning, but it does not document every hidden fixing point. Follow the instructions for the selected product and have the installer inspect access before beginning.
Do carbon fiber mirror caps work with a mirror camera?
They can when the correct product variation retains the required camera opening. Confirm the mirror shape, camera position, indicator and left- or right-hand-drive configuration.
Will a front lip reduce ground clearance?
Yes. Any extension below or ahead of the factory bumper changes the lowest practical point and approach angle. Consider the vehicle’s ride height and daily routes before installation.
Should all carbon fiber parts use the same finish?
A consistent weave and gloss level usually produces the most unified result. Mixing finishes can work, but the difference should be planned rather than accidental.
Can these parts be installed at home?
Small add-on pieces may be manageable for an experienced owner. Full-width lips, replacement mirror shells and engine-bay pieces near wiring or service points are safer when checked by a professional installer.